Monday, April 4, 2011

How to make an Easter Tree

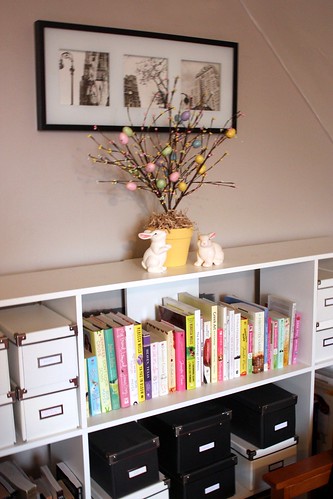
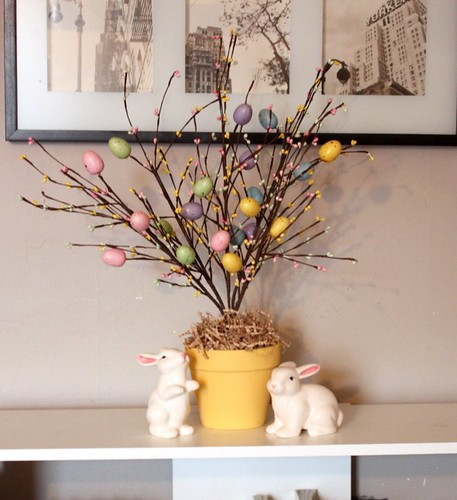
Things are finally starting to feel a little like Spring around here, which means that its time to get some Easter decorations out! This year I decided to make a little Easter Tree to put on the bookshelf in the living room. It seemed like just the ticket for brightening the place up for the new season!

I tried to use some things that I already had like the terracotta pot, paint and filler, and in the end the whole project only cost me $7, including the bunnies! Not bad considering how expensive a tree like this would be from a decor store.

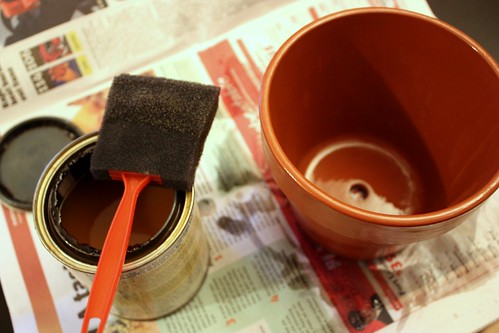
To start off, I applied shellac to the interior and exterior of the pot. Using a foam brush, I made a thin layer, allowed it to dry and then applied another thin layer. Just to be sure that it was no longer sticky, I let it completely dry overnight.

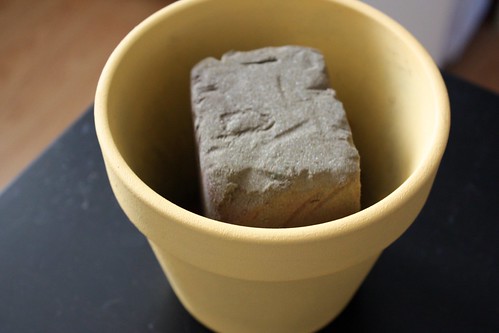
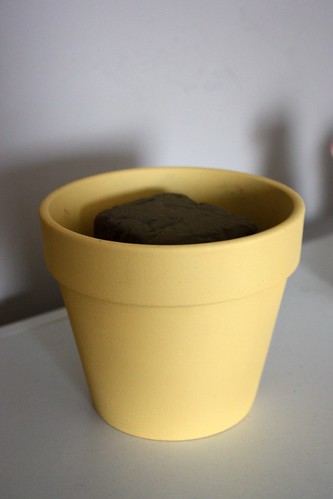
The next morning, I used a small foam roller to apply pale yellow acrylic paint. To prevent any uneven areas, I did several thin layers, allowing drying time between each coating. Once it was completely dry, I cut a piece of craft oasis (foam) to fit the inside.

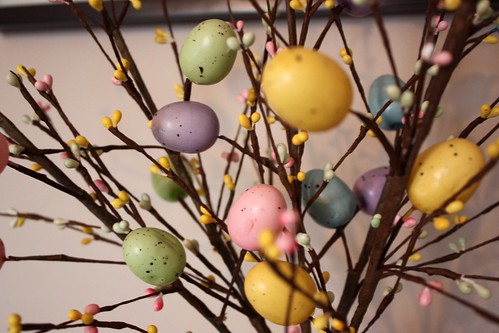
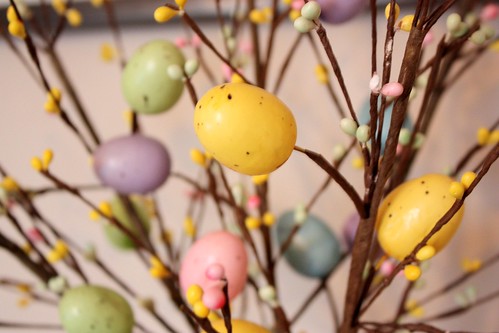
These sticks made the tree so much easier to made. Originally I was going to attach my own plastic eggs to branches I found outside, but when I noticed these at the dollar store (Dollarama, for all you fellow Canadians) I realized that my work was done for me. At $1 a branch, I picked one in every colour - pink, yellow, purple, green and blue.


I love the sweet little buds and the speckled details in the eggs. I still can't believe that these were only a dollar!

Before putting the branches in, I made sure that the oasis block was firmly in place.

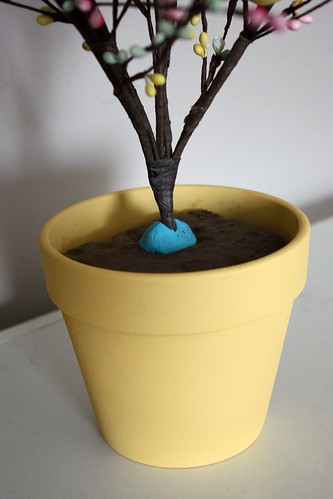
I cut the branches to the desired height, then wrapped them together with some brown florists tape. I didn't want them to wobble in the oasis, so I wrapped some blue poster putty around the base to secure everything.

To hide the oasis and the putty, I used some packing grass that I had from a package that was delivered. Its nice to find a way to reuse something like that!

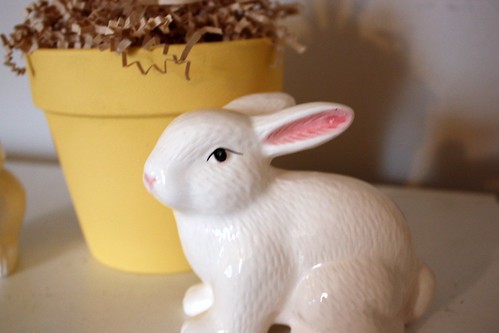
These sweet little bunnies were also a dollar store find. Originally I was going to paint them over with matte paint, but in the end I loved the little hand painted details, like the nose, ears and eyes.

Its amazing how a little bit of colour in your apartment can do wonders for your mood!

Next time I made something like this, I might take the time to grow some real cat grass to have along the edges, but that takes about two weeks of forethought, and I'm lucky if I have two hours.

To keep with the theme, I also rearranged the books on the shelf to try and match the Spring colours. I usually keep them organize in a rainbow pattern (or even red and pink for Valentine's Day), but this decor just seemed to call for pastels.

I've made a few other little Spring tweaks to the apartment lately and I'll be sure to post them this week.

Have you been doing any Spring decorating?
How excited are you for warmer weather to be on the way?

Thursday, December 2, 2010

Gingerbread Man Ornaments

While brainstorming for a fun ornament to make this year, I thought back to what my grandparents and great grandparents would have done during tough times, like many people are facing these days. I decided to only use things that I already had and pulled out my box of miscellaneous craft supplies. Within the slew of things I found brown felt, embroidery floss, ribbon and buttons. What could I make with this?

A Gingerbread Man! 

Safe enough to have around with the pooch, easy to make, and most of all...festive and cute! You can adapt this to make with kids by cutting shapes out of felt to glue onto the gingerbread man shape. I decided to put these all over my tree and made them with some simple sewing. The perfect craft to do while watching Christmas movies :)

What you'll need:
Brown Felt
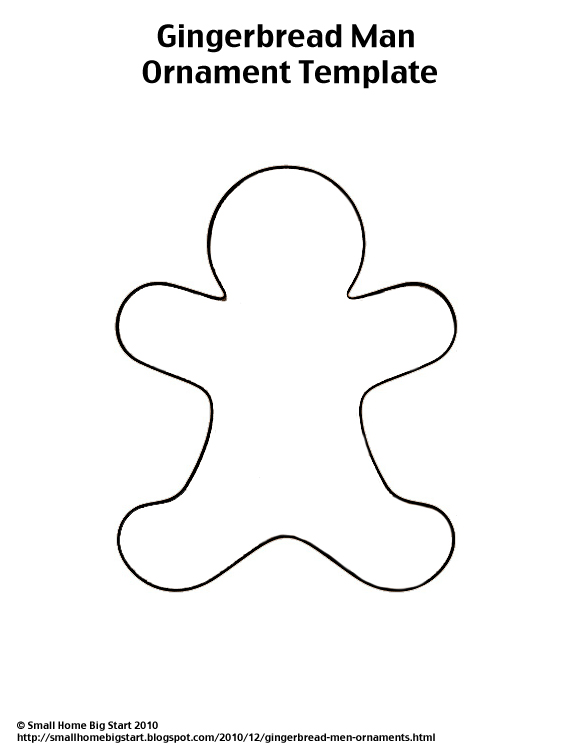
Gingerbread Man Shape Template (Resize to fit a 8 1/2 x 11 piece of paper)
Scissors
Small Buttons
Embroidery Thread (Cream, or whichever colour you prefer)
Embroidery Needle
Thin Ribbon (To hang the ornament)
Brown Thread
Sewing Machine

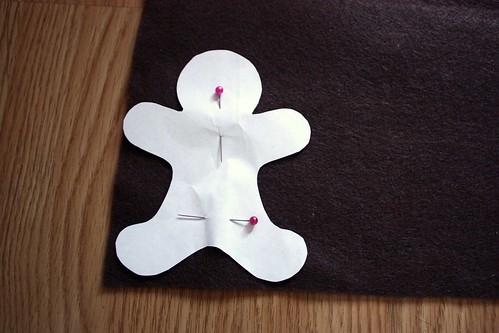
Print out the template to your desired size and cut it out. Pin the template to the brown felt, cutting two pieces for every gingerbread man you would like to make.

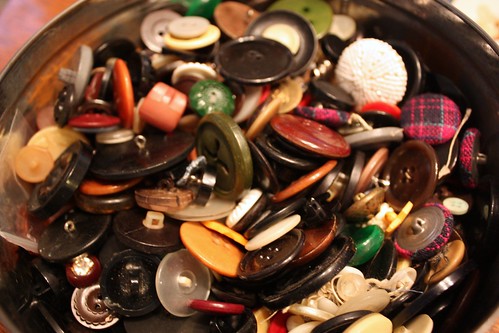
For the buttons, I went to my Great Grandmother's trusty Button Tin, full of buttons that have been collected for the past four generations.


Back then, my Great Grandmother would cut the buttons off of any garment before it would make it to the trash bin (or more likely, the rag bin to be reused again for cleaning). I still keep all the buttons from things before I through them out and have started a little bag of buttons at my own apartment. You never know when you need buttons to repair a shirt, or for a project like this!

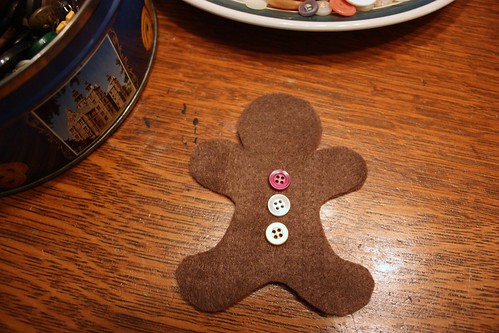
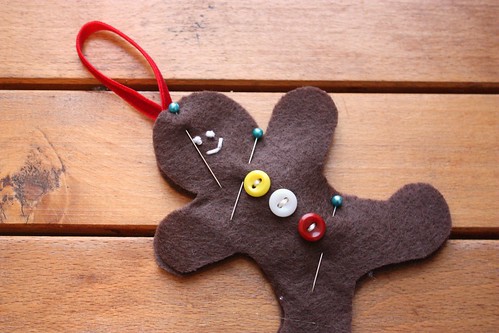
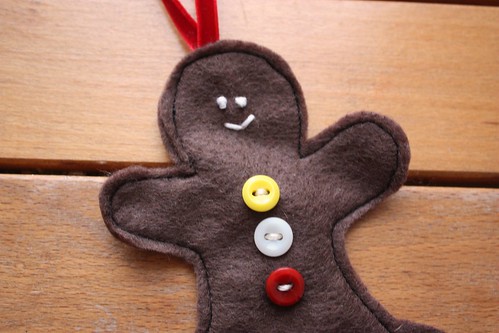
I looked for buttons that were proportionate to the ornament, similar in size, but varied in colour.

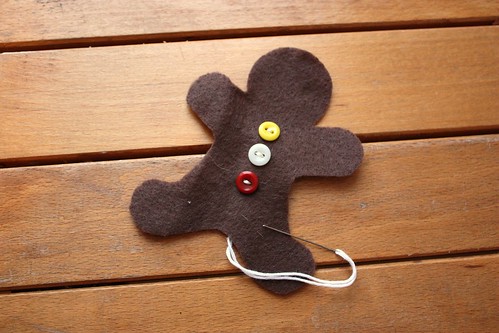
Using the embrodiery thread, sew the buttons in place.

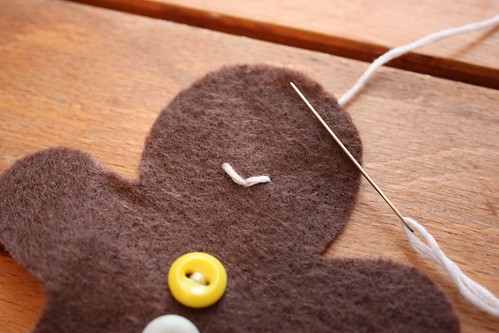
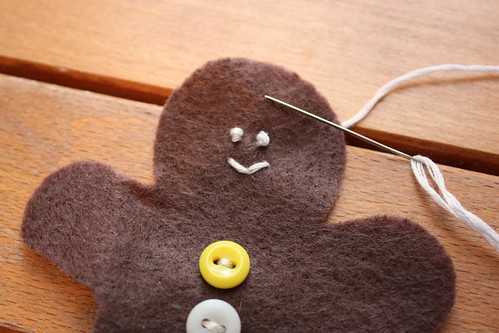
 Create the mouth with 2 slanted stitches with the embroidery thread.

The eyes can be made with a simple French knot using the embroidery thread.

Image Source
To make a French Knot, bring the floss out at the spot where you would like the eye. Hold the embroidery thread down with you thumb and encircle the needle two times. Still holding the embroidery thread, pull up and gently allow a knot to form. Push the needle back in the felt near the original entry point, being carefully not to pull the entire knot through to the backside.


Pin a 6" piece of the ribbon in a loop at the top of the head. Pin a blank gingerbread man shape to the back of the button one.

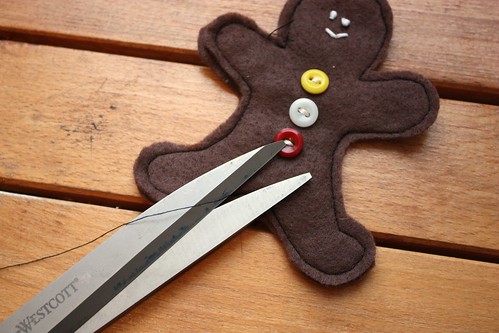
Using brown thread on a sewing machine, stitch 1/8" in from the edge around the entire shape. Don't worry if its not perfect because you can cover mistakes with the stitching later. If you would like to stuff it slightly to make it a little puffy, you can do so now, by leaving a 1/2" hole in the stitches on one side. Then lightly stuff the shape and sew the hole by hand.

Trim any excess thread or felt that doesn't line up.

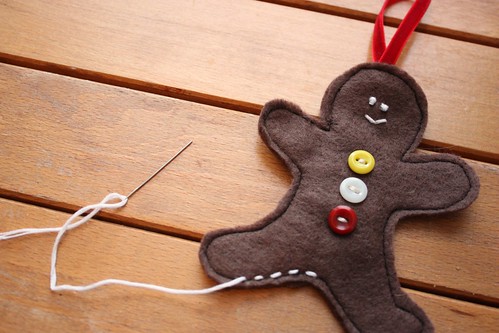
Using the embroidery thread, do a running stitch all around the shape. To do a running stitch, pass the needle in and out of the felt, making the surface stitches of equal length. The stitches on the underside should also be of equal length, but half the size or less than the upper stitches

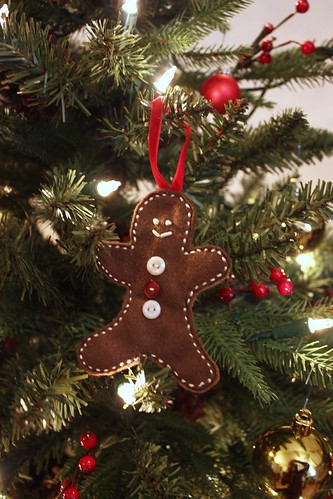
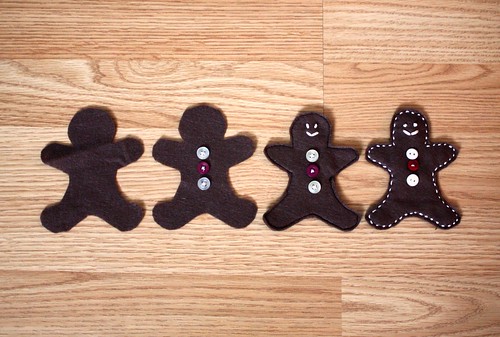
Here is a gingerbread man from start to finish.

And there you have it! A simple, yet cute Gingerbread Man Ornament! You can get creative and add anything you'd like to it. Rickrack lines on the arms and legs? A cute little bow tie? Anything will do :)

Here they are on the Christmas tree, looking fun and festive. I made 9 to go around my tree, but the great thing is that they are easy to whip up more for another year with a bigger tree.

Thursday, October 28, 2010

Tutorial: Dog Bat Costume

After the success of Whiskey's taco costume last year (tutorial here!), I had to think of something new for him this year that was both comfortable for him to wear and easy for me to make. It was those big cute ears of his that made me think of a bat. It was perfect! I made it while watching a movie, so it took me less than 2 hours to make it. Not too bad.

I decided to use black felt and a coat hanger as the main components to keep it soft and light. Thankfully, Whiskey loves wearing sweaters (he gets all jumpy and excited when I pull them out), so he's pretty content to wear this costume. I just have to keep an eye out for when he goes under chairs or he gets stuck.

Here's a quick step-by-step tutorial on how to make this yourself!

What you'll need:
- Measuring Tape
- Scissors
- Wire Cutters
- Pliers
- Sewing Machine (or needle if you're ambitious and want to do it by hand)
- Black Felt
- Coat Hanger
- Black Thread
First, I made a bat wing shape out of cardboard that was proportional to Whiskey's size. Then I cut out 4 of the wings in black felt, making two for each side.

Using my sewing machine, I stitched two of the wings together all along the top about 1/4" in from the edge, and then another stitch about 1/4" below that curved line. Then I stitched 1/4" in from the edge all along the edge of the rest of the wing, making sure to leave a space open where the wire will go in between the two upper stitches. Repeat with the other wing.
After both wings were stitched, I took scissors and cleaned up along the edges and make they all look neat and clean.

Next, I took an old coat hanger and straigthened it out using pliers. I made a curve in the middle to match the curve on the width of Whiskey's back, where the wings would go. Then I placed one of the finished felt wings down and curved one of the sides of the hanger to match the curve in the fabric. I repeated with the other side. Using wire cutters, I snipped off any excess coat hanger.

Now the wings slipped right on to the hanger, like so.

To make the belly band to go around Whiskey's back, I measured aroud his chest, adding 1 inch for overlap. Then I sewed velcro tabs on to make it easy to take it on and off.

This is how the band looks on his chest when put on. Next, I measure along the front of his chest, from the edge where the band is on one side, to where is was on the other side.
I added an inch on one side to sew it into the existing band, and then an inch on the other side for the velcro tab tucked in under the existing band. So it was the front of his chest + 2 inches.

One end of the chest strap was stitched one inch in on one side of the belly/chest band.To hide the velcro closure on the other end of the chest strap, I sewed it on the inside of the larger band. When I put it on him, I velcro the front chest trap on first, then the belly/chest band.

To add the wings, I put the sraps on him and then doubled checked where I wanted to place the wings on the band, and marked it.

I took a small piece of felt that was the length of the middle piece of curved wire and pinned it on the back of the belly band right where I wanted the wings to go. Then it was a matter of sewing four lines 1/4" apart from each other. The middle slot that I created was to hold the middle curve of the wings and the outer slots are just for support. I then trimmed any excess felt. Next, I removed one of the felt wings and then fed the wire through the middle slot. After it was secure, I added the wing back on. Then is was just a matter of quickly hand sewing a couple of stitches through the wings and band right where they meet, to make sure that they stayed on the wire.

We had a family party earlier this week, and I showed off Whiskey's costume there. It was a huge hit.

And I'm starting to think that he's liking all the attention he gets with it.

Shadow was happy to try it on too, although I think it makes her look scary rather than cute.

Especially with that crazy little ear that curves up. She's like a shark/dog/bat monster mutation...but I still love her to bits.

Are you dressing up your pets for Halloween this year?


This tutorial is linked up to:

Creations by Kara
 Make it Yours @ My Backyard Eden The Trendy Treehouse  NightOwlCrafting giveaways A Crafty Soiree Beyond The Picket Fence Get your craft on Thurs.  Black Kats Design HookingupwithHoH